


")


Cladding | Weatherboards
Siding usually consists of weather-resistant material in the form of planks and accessories for quick and easy installation. The smaller dimensions of the planks would allow for expansion and contraction due to moisture and temperature changes. There are two standard methods of siding installation, the traditional overlap, and the newer and groove flush siding. Both these methods use the ventilated rainscreen principle - air can flow in at the base of the system, behind the cladding and then out, over the top siding system. This air flow behind the siding enables the system to remove moisture and to keep the walls dry, thus creating a more comfortable living environment.
Advantages
- Lightweight, quick and easy to install
- Cost effective
- Easy to maintain and repair
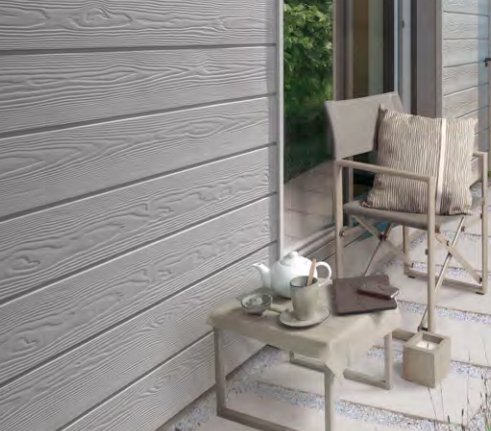
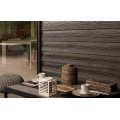
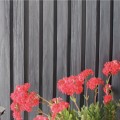
- Has attractive aesthetic qualities
- Can have timber like surface finish
- Protects from effects of sun, rain and snow
- Has very good acoustic properties
- A sustainable material

Types of weatherboarding
- Overlap method,
- Flush tongue and groove method
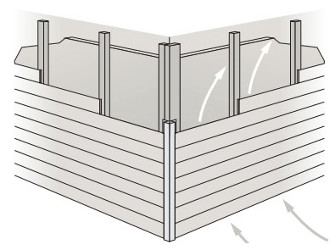
Overlap Method
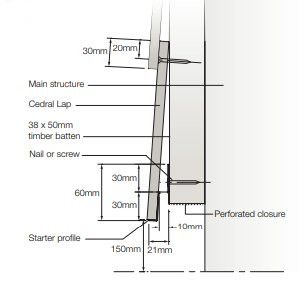
The weatherboard planks are laid horizontally across the wall on vertical battens, starting from the bottom, and building up, the board below overlapped by the board above it at least by about 30mm. It is preferable that weatherboarding planks are installed horizontally, as rain can flow down the front face of one plank onto the one beneath. If the planks are installed vertically, you might come across a problem of water flowing down through joints. Also, you have to ensure that the plank overlaps be arranged away from the prevailing wind.
Installation
- Fix a damp proof membrane fitted between the battens and the building structure.
- Fix vertical timber battens at 600mm centres.
- Ensure a gap of at least 30 mm behind the boards to allow air circulation and prevent moisture build-up.
- Install the starter trim on level.
- Install the first board on the starter trim.
- The planks should be screwed or nailed flush at every batten, so that it doesn't interfere with the next board. Stainless fixings are advisable for best durability.
- A cover strip or drip trim should be fixed at the top to prevent moisture from entering the cavity.
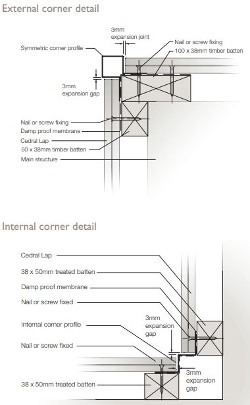
- Use relevant trims at corners, window and door reveals and open ends.
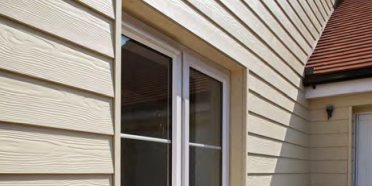
Flush tongue and groove method
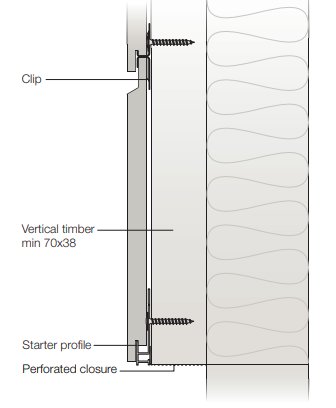
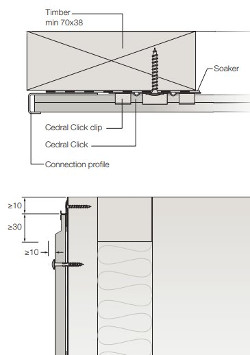
The weatherboard planks are fixed on top of each other, the tongue pushed into the groove. This gives a flush effect. Water would flow down much faster, without stopping at the joints. They can be fixed horizontally and vertically, but the preferable choice is the horizontal installation.
Installation
- Fix a damp proof membrane fitted between the battens and the building structure.
- Fix vertical timber battens at 600mm centres.
- Ensure a gap of at least 30 mm behind the boards to allow air circulation and prevent moisture build-up.
- Ensure a 10mm opening at the base, head and at the window,door and cills.
- Install the starter trim on level.
- Install the first board on the starter trim.
- The planks should be screwed or nailed flush at every batten, so that it doesn't interfere with the next board. Stainless fixings are advisable for best durability. Use appropriate countersunk head screws.
- A cover strip or drip trim should be fixed at the top to prevent moisture from entering the cavity.
- Use relevant trims at corners, window and door reveals and open ends.
Choose subcategory or scroll down to see products

CHOOSE MANUFACTURERS


