How To Dot And Dab Wall Insulation Boards
by Mark Row
Simple Instruction for an Efficient Solution
Since purchasing an insulation material is costly itself, it is not uncommon for people trying to find some alternative ways to save some money on their home insulation project. One way of saving some money in the process is often found in the installation part, since people are trying to find adequate installation instructions in order of doing the job themselves, instead of hiring a professional for the job. Well, if this is a case with you, then the first thing you should know is that some insulation products are best installed by professionals since they involve special installation techniques and equipment that is either too costly or not as available. This is the case with, for example, different types of blown-in or spray-foam insulators. On the other hand, some insulation materials such as rigid insulation boards or fibre insulation can be a DIY job, which usually makes them more cost-efficient. Also, you will note that even the same material can be installed in more than one way, why it is important to choose the installation technique that will allow you to save some money and time, but still do the job right.
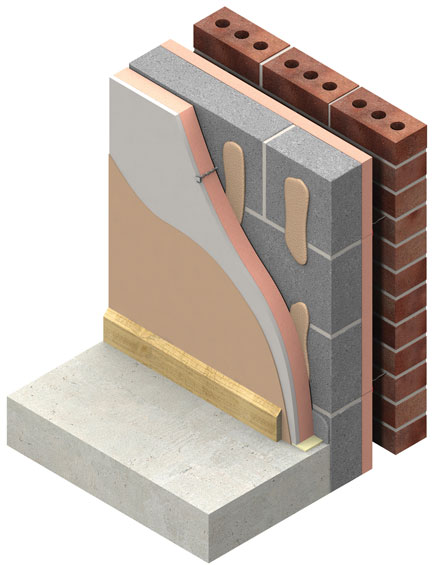
The good news is that certain installation techniques are quite versatile and can be applied for more than one product why they are more than useful to learn about. One such installation technique is the so called dot and dab installation method that is applied to almost any kind of wall boards, including plasterboards, plasterboards with insulation (like these insulated plasterboards) and finally all types of rigid insulation boards such as PIR, PUR and phenolic boards. Since all these boards have their own purposes and are proven to be more than useful, we believe it is time you’ve learned how to dot and dab wall insulation boards.
Prior to commencing any installation project, it is important to be aware of the fact that although the given set of rules is generally applicable, you should always carefully read the manufacturer’s instructions following a specific product, since sometimes even the details can be of great importance. Now, gather all the necessary tools (such as a pencil, a trowel, water and mixing buckets, tape measure, a straightedge) and materials (the chosen wall board, appropriate adhesive, some water, mechanical fixings and necessary) and you can commence your dot and dab wall board installation project.
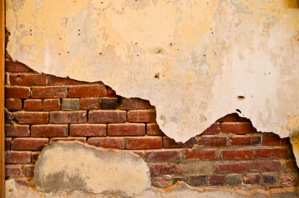
- Prior to attaching the board onto the wall, it is important that the surface it is being attached to (the background) is clean, dry and smooth. Make sure to clean any debris and dirt off the wall, and to take care of any moisture problems. If there are any minor damp issues, they can be taken care of with some sealant used to cover the wall surface. If you have encountered with some more serious moisture and damp problems, note that they will have to be solved before you carry on with your work.
- The next step involves measuring the wall and accordingly cutting the board so it fits the wall, unless you have purchased an already pre-cut and ready-made board. You should start from the highest point of the wall, ideally the wall and ceiling joint point or, if not possible a lintel, some concrete lump that cannot be removed or a protruding brick, depending on the wall surface. It is important that the board attached with both floor and the ceiling why you should mark the width of the board onto the wall that will help you hold and place the board into the right position.
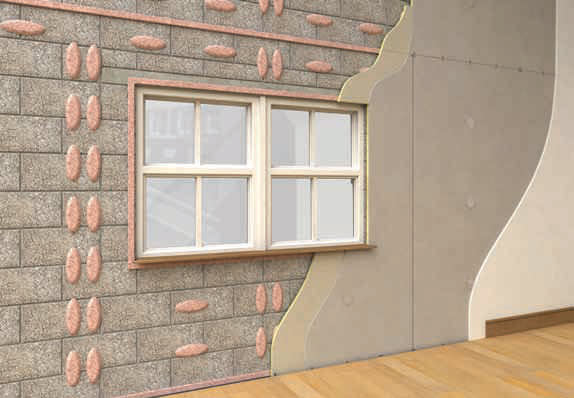
- The adhesive should be then added to the wall, upon mixing it with some water, in accordance with the manufacturer’s instructions. A continuous line of the adhesive should be added to all perimeter wall and ceiling junctions in order of making sure that the board will be fit tightly to the wall, with no gaps or space between, since these can present a nest for insects. This also goes for any openings around doors or windows which also need to be sealed. Then the dot and dab installation technique should be applied to the wall surface. Make sure for the dots and dabs of adhesive not to be more than 25mm thick, not more than 25mm apart from the board edge, around 50mm in width and 250mm in length. However, the thickness and placement of the adhesive dots and dabs will depend on the board size so always follow the given instructions when arranging the dots and dabs.
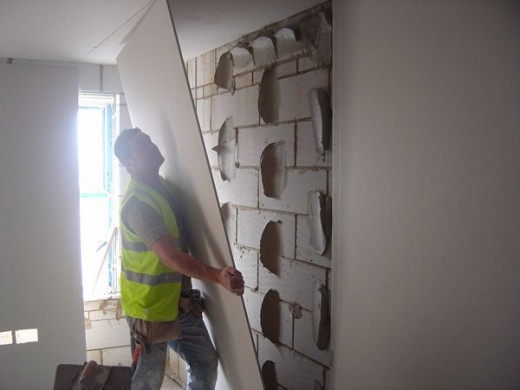
- Now it is time to place the board onto the wall. Lift the board and hold it against the wall, making sure that it is leveled with the floor and ceiling. Press it against the wall, onto the adhesive and hold until you are sure that it is fitted onto the wall. Finally, use the straightedge and tap it onto the board surface in order of making sure that it is firmly fixed onto the adhesive dots and dabs. Continue the process until all the boards are installed and covering the entire wall surface, thus finishing your dot and dab wall insulation project.

Finally, note that certain boards will also require installing temporary and permanent mechanical fixings that will hold the board in place, so always read the given guidelines carefully and consult the manufacturer if in doubt.
For more information about using the dot and dab method to install wall insulation boards or plasterboards, please read the product specifications and follow manufacturers instructions. Feel free to contact us with your questions and to leave a comment.


