Brick Slips Installation Guide
by Mark Row
 Brick Slips - Alternative to Traditional Cladding
We all want our home to look good not only on the inside but also on the outside which is a well known fact. This is why when designing and constructing our home, we invest a lot of effort into the cladding system and the facade of the building. Well, why not take things one step further and try to think more practical and cost efficient. Namely, our home exterior always turns out to be much more than just “a pretty face” since it has a significant role in protecting the interior from all harmful exterior effects such as the wind and rain, extremely low or high temperatures etc. If all the named things become a part of the entire project then there is a chance that you will be more than pleased with the overall result. The good thing is that there is a quite simple way to achieve everything that you may find important – to lower the construction costs and ease the construction work on one hand and to improve the strength, stability, aesthetics and thermal performance of your household on the other. This simple solution can be found in modern brick slip systems, which present a very efficient and practical alternative to traditional brick cladding systems, but bear many advantages.
Brick slips are basically thin clay bricks that are usually installed as a part of a system which includes some type of rigid, panel insulation that not only presents a great base for the slips, but also offer insulation and additional protection for the exterior wall. Since much lighter and versatile than traditional brickwork, they have become quite popular, why we believe that what you need is a brick slips installation guide, shown in a few simple steps and rules you need to follow in order of ending up with an exterior you are going to be fully satisfied with.

Prior to even commencing the project, there are a few things you need to be aware of. Make sure that all components are properly protected from the sun and humidity, why they should be stored in dry and clean conditions. For more detailed information, please refer to the manufacturer’s instructions. The surface of the wall, regardless of the material, should be clean and dry, so that the adhesion would not be endangered. Also, depending on the wall material (timber frame, metal, concrete or masonry), there might be some additional considerations.
-
Step - Adding the Panel
The first step in installing brick slips includes adding a panel that will be used to hold the slips and to also add some texture and stratification to the wall surface. This could easily turn out to be the most important part of the entire system, so choose it carefully. In order of adding some insulation, we advise you opt for some rigid insulation boards, specially designed to be combined with exterior wall finishes. Some solutions can be found right here at Insulation Shop, so since expanded polystyrene is one of the most efficient insulation materials, we advise you choose Jablite or Kay-Meltzer polystyrene insulation boards.


The first thing you need to do is determine the horizontal datum used to level the panels (the chosen datum could be the door or window head, for example). Once the first panel has been installed, all the other panels need to go tightly next to one another, with all horizontal tracks perfectly aligned. If there are any gaps between the panels, these can be filled with some adhesive or alternatively some waterproof sealing tape. If the work cannot be carried out in a single day, make sure that the panels that are not covered with brick slips are adequately protected from the weather with some waterproof and UV resistant sheeting. Even if the panels are covered with the slips, they should not be exposed to extreme weather conditions (such as low temperatures or high humidity) and should be protected for some time upon installation. Recommended fixings and fasteners are also required to hold the panels in place. Special care should be given to adding fasteners around door and window openings and at building corners. Also, if any extra weight is added to the panels (depending on the weight and size of the slips), additional fixings may be required. The panels should overlap if they are installed at external corners, in order of avoiding creating voids in the insulation.
-
Step - Adding the Brick Slips
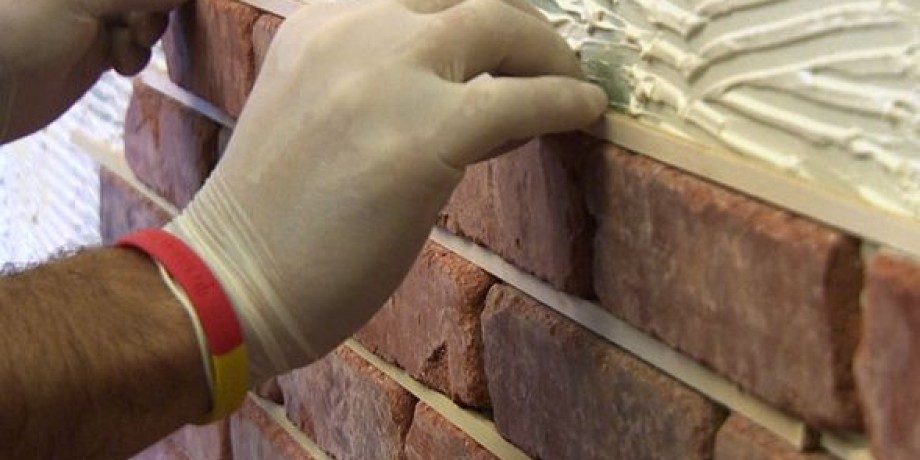
Once the panels are in place, it is time to install the brick slips. Make sure that both the slips and the panel surface is dry and clean prior to installation. The slips are fixed to the panels using specially designed adhesives and at adequate temperature conditions, since extremely low temperatures and high humidity can affect the adhesion time. When determining the layout and spacing between the bricks, it is best to start from the most visible corner and run couple of courses of the slips from one end of the wall to the other. Half or full bricks at the end of the panels and the end of the wall can be achieved by adding cut bricks or adjusting perpendicular joints. The plumb lines should be marked on the panel face and the adhesive added from the brick spacing track top edge for around 2,5m and then repeated for around 20 courses. The brick slips should be applied onto the marked space, between the track ribs. Make sure that all slips are perfectly aligned and positioned in the same plane.

-
Step - Adding the Mortar
Finally, once the brick slips have been installed into place, it is time to do the pointing, by adding mortar between the slips. It is important to choose the colour that will match the colour of the slips, so always make sure that the chosen colour will not (drastically) change once mixed with water. It is very likely that the chosen mortar colour will be under the influence of the weather, so always read the manufacturer’s instruction with great care and ask for additional information is necessary. Mix the grout with some clean water, in accordance with the given specification and apply it to horizontal joints and then to vertical joints. Once firm enough, tool the grout, making sure that there are no gaps and holes in the mortar which need to be filled and tooled. Once the tooling has been completed, leave the mortar to settle and then add the finishing touch with some stiff bristle brush at an angle of 45º so that the grout will remain in place. A 10mm weep hole should be left at the brick panel base, so that any moisture can come out.
Finally, once your brick slips installation project has been completed (upon at least 48 hours), if it necessary to clean the surface, use some clean water or alternatively some masonry cleaner, but make sure that it will not in any way affect the brickwork.
If you want more information about the brick slip system components or would like to order the whole system from our insulation store contact us on 08455441077, 02033972133, through our live chat support system or send an email to info@insulationshop.co.


